
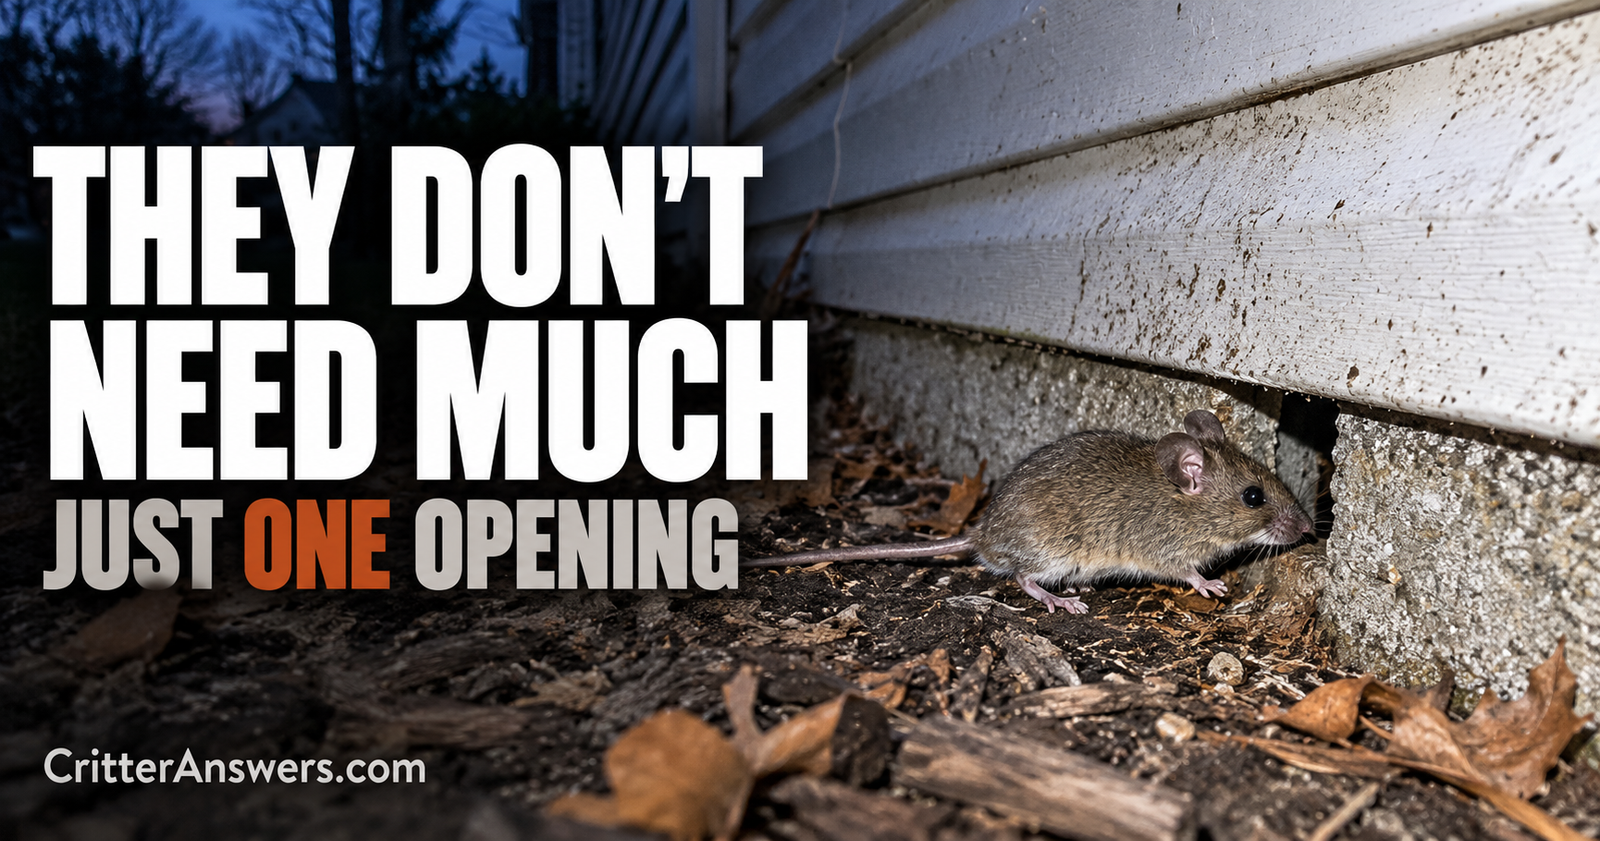
If you have mice in your house but can’t figure out how they’re getting inside, there’s a good chance you’re looking for a hole that’s much too big.
Mice don’t need a doorway.
They don’t even need a gap that looks particularly serious to us.
A house mouse can squeeze through an opening about 1/4 inch wide — roughly the width of a pencil.
That’s small enough to completely change the way you should inspect your house.
I wouldn’t walk around looking only for obvious damage. I’d look closely at every place where pipes, wires, doors, siding, vents, roofing, and different building materials meet. The same overlooked gaps around pipes and vents can also provide entry routes for other household pests, as this guide to gaps around pipes and vents explains.
Those little transitions are where mouse-sized openings like to hide.
And if mice keep showing up after you’ve trapped them, an overlooked entry point is one of the first things I’d suspect.
Start With the Pencil Test
The 1/4-inch rule gives you a simple way to look at your house differently.
If an opening is around the width of a pencil, don’t dismiss it as too small for a mouse.
CDC says mice can fit through a hole approximately 1/4 inch, or 6 millimeters, in diameter.
That means a gap that barely catches your attention may be enough.
Look especially carefully around:
- Pipes
- Utility lines
- Doors
- Garage doors
- Foundation transitions
- Vents
- Siding
- Eaves
- Soffits
- Roof openings
- Crawl spaces
Don’t worry about identifying the exact entrance during your first five minutes outside.
Your first job is finding every suspicious mouse-sized opening.
Before Looking Outside, Figure Out Where the Mice Are Inside
This can save you a lot of time.
If all your mouse evidence is concentrated beneath the kitchen sink, I’d pay particular attention to plumbing penetrations and the exterior wall around that area.
If you’re finding droppings in an attached garage, start around the garage doors, utility lines, foundation, and wall shared with the house.
If you’re hearing mice in an upstairs ceiling or finding evidence in the attic, don’t spend your entire inspection staring at the foundation.
Look higher.
The location of the indoor evidence can help point you toward the part of the structure you should inspect most carefully.
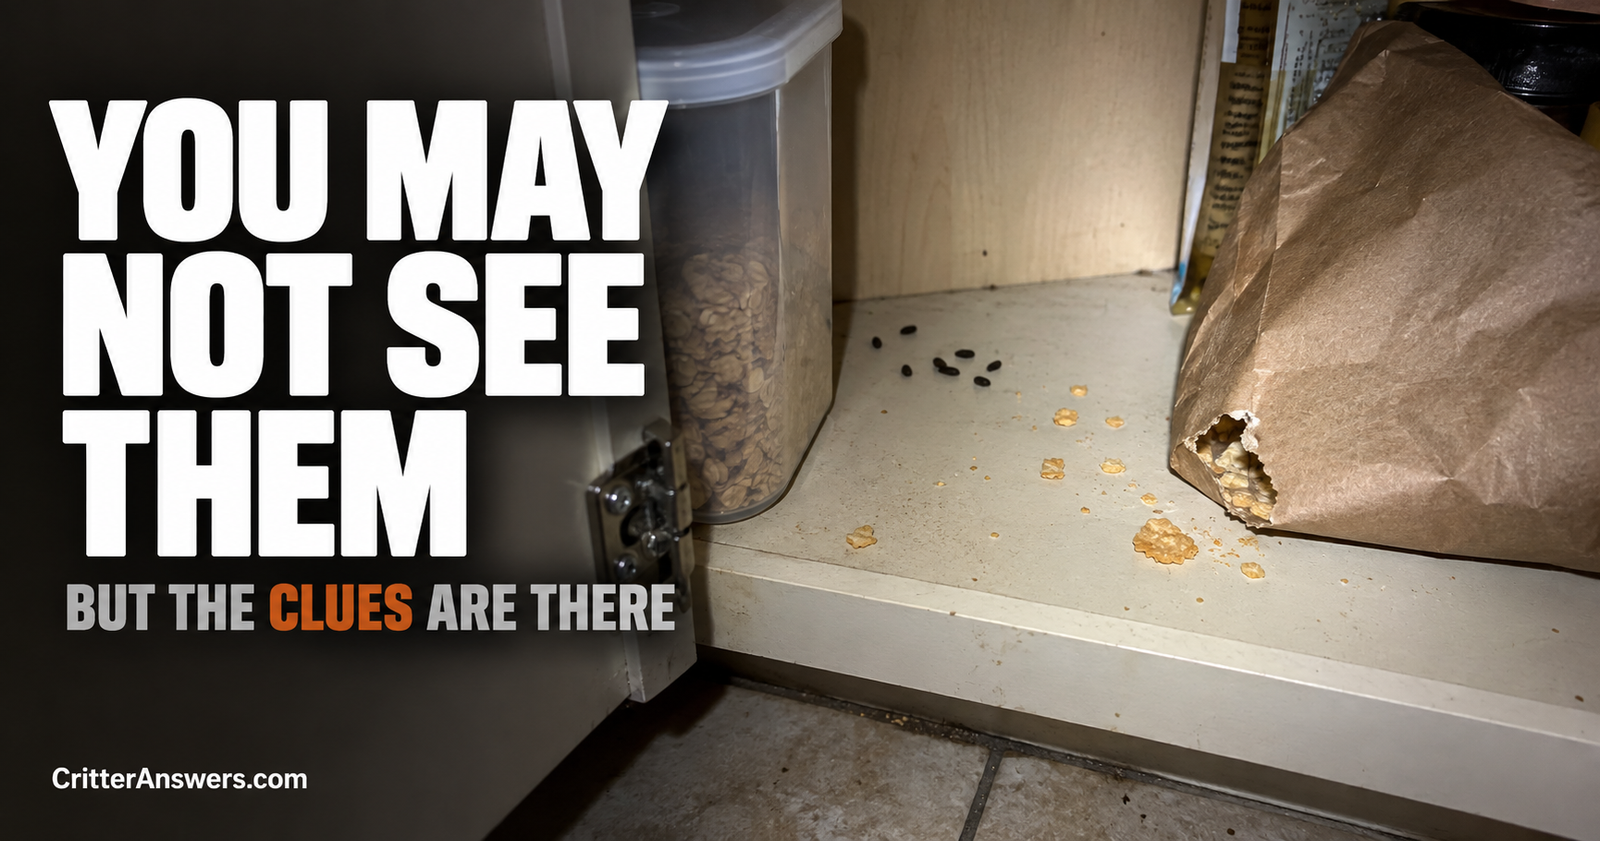
If you’re still not positive mice are the culprit, start with our guide to the signs that mice are in your house before chasing entry points.
1. Gaps Around Pipes Are One of the First Places I’d Check
Houses are full of holes that were intentionally made during construction.
Plumbing has to get through walls and floors somehow.
The problem isn’t the pipe.
It’s the extra space around it.
Look beneath sinks where water and drain lines enter the wall or floor.
Then inspect around:
- Washing-machine plumbing
- Water heaters
- Outdoor faucets
- Dishwasher lines
- Bathroom plumbing
- Furnace lines
- Other pipe penetrations
Sometimes you’ll find a neat hole that’s only slightly larger than the pipe.
Other times you’ll find a surprisingly large rough opening hidden inside a cabinet.
CDC specifically recommends inspecting around pipes beneath sinks and washing machines as well as pipes leading to water heaters and furnaces.
These spots are easy to overlook because they’re usually hidden behind cabinets or appliances.
Look Under Your Kitchen Sink
I’d make this one of my first indoor stops.
Empty enough of the cabinet that you can actually see the back wall.
Use a flashlight.
Look where every pipe enters.
Then check the corners and the floor-to-wall joint.
You’re looking for two things:
An opening.
And evidence that mice are using it.
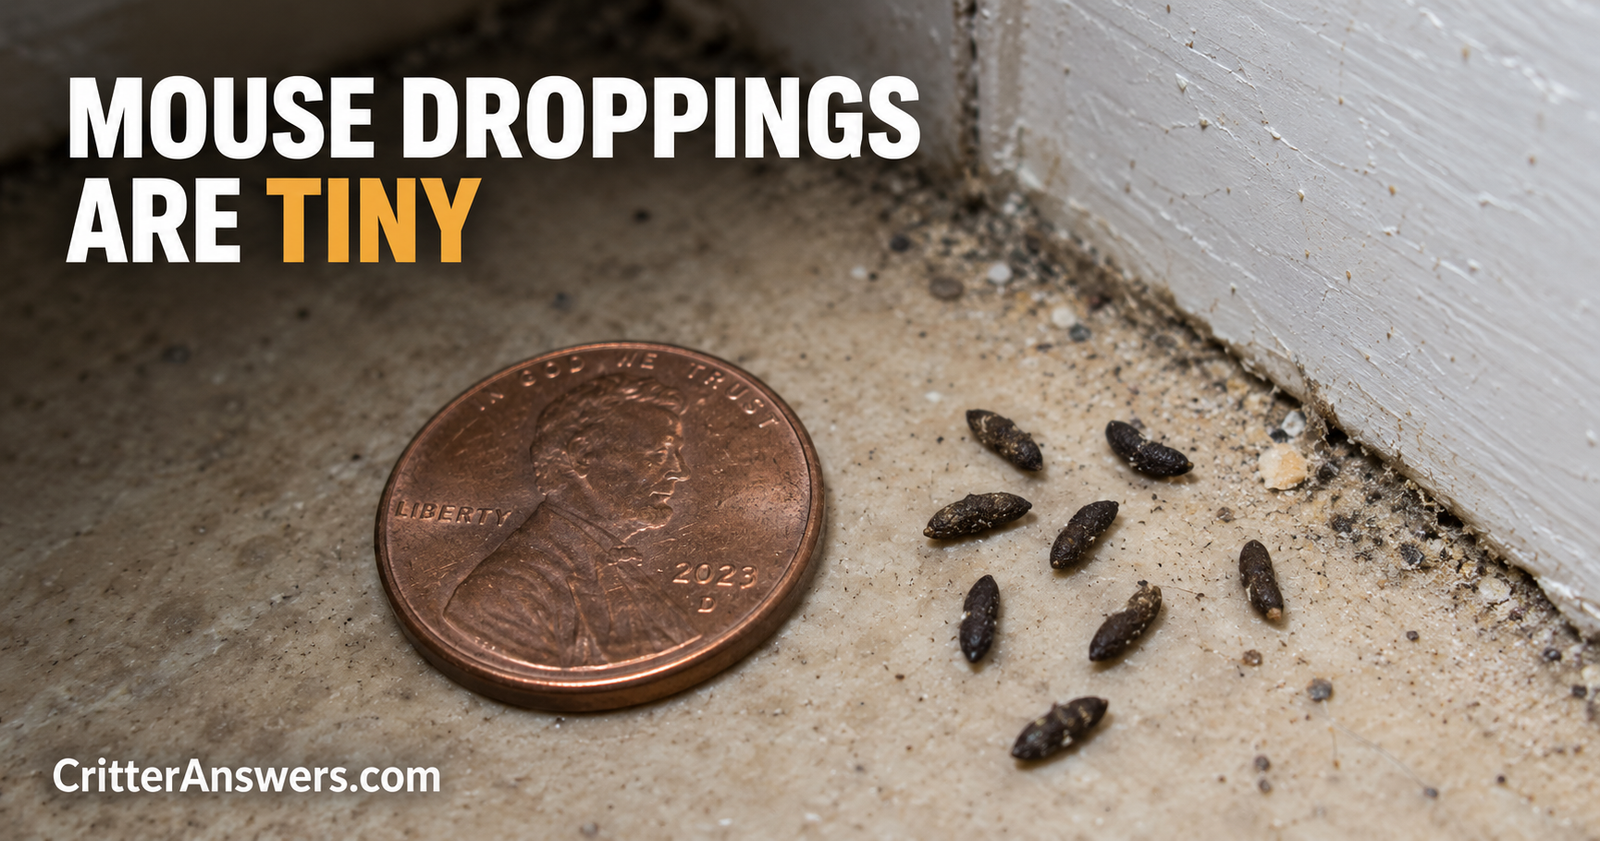
That evidence might include droppings, gnawing, nesting material, or staining around a frequently used route.
Finding a gap beside a pipe doesn’t automatically prove it’s the mouse entrance.
But a gap beside a pipe with fresh mouse evidence around it deserves attention.


2. Utility Lines Can Leave Mouse-Sized Openings
Plumbing isn’t the only thing entering your house.
Look where:
Electrical lines.
Cable.
Internet lines.
Gas lines.
Air-conditioning lines.
And other utilities penetrate the structure.
CDC specifically identifies electrical, water, gas, sewer, plumbing, and cable penetrations as areas that should be checked for rodent openings.
The problem is often simple.
A contractor needed a hole.
The hole ended up larger than the line.
The remaining space became a potential entry point.
Don’t Only Inspect the Outside
Sometimes the exterior penetration looks reasonably sealed while the interior opening is enormous.
Check both ends when they’re accessible.
A mouse may enter the structure somewhere else and then use oversized interior utility openings to move from a wall cavity into a kitchen, bathroom, basement, or utility room.
That’s an important distinction.
Not every hole you find indoors is necessarily how the mouse got into the house.
Some holes are how it’s moving through the house.
You eventually want to address both.
3. Check the Bottom of Exterior Doors
Doors are obvious entry points, but the gaps aren’t always obvious until you get down and look.
Close the door.
Then inspect:
- Both bottom corners
- The threshold
- Weather stripping
- Door sweep
- Sides of the frame
- Damaged material around the jamb
A door can look perfectly normal from standing height while having a mouse-sized opening at one lower corner.
If you can see daylight where you shouldn’t, investigate.
Doors and screens should fit tightly enough that mice can’t squeeze around them.
Check Little-Used Doors Too
Everyone notices the front door.
I’m more interested in the basement door nobody opens for three months.
Or the old side door into the garage.
Or the utility-room entrance.
Weather stripping deteriorates.
Doors shift.
Wood moves.
Thresholds wear.
Something that sealed reasonably well years ago may not seal today.
Walk around the house and inspect every exterior door, not just the ones your family normally uses.
4. Garage Doors Can Be a Major Weak Spot
Garage doors deserve their own section.
A large overhead door has a lot of perimeter to seal.
The bottom seal can wear out.
Corners can leave gaps.
The door may not sit evenly against the floor.
And garages frequently contain exactly what mice want:
Food.
Shelter.
Cardboard.
Clutter.
Pet food.
Bird seed.
Grass seed.
Animal feed.
Once a mouse gets into an attached garage, it’s already one step closer to the living space.
Look at Both Bottom Corners of the Garage Door
Close the garage door completely.
Go inside during daylight.
Look at the bottom.
Do you see light?
Pay special attention to the corners where the vertical weather seal meets the bottom seal.
Those little intersections can leave surprisingly useful openings for rodents.
Also check whether the door actually contacts the floor evenly.
An old or uneven slab can create a gap even when the garage door itself is functioning properly.
Don’t Stop Once You’ve Made the Garage Mouse-Proof
If you’ve already found mice in an attached garage, inspect the garage-to-house barrier too.
Look around:
The interior entry door.
Utility penetrations.
Shared walls.
Plumbing.
Electrical lines.
HVAC penetrations.
A mouse may have entered the garage from outdoors and then found a second opening into the house.
You need to break the whole route.
5. Inspect Where the Foundation Meets the House
Walk the entire perimeter.
Slowly.
I’m not talking about strolling around once while looking from six feet away.
Get close enough to see what is actually happening.
Look where:
Foundation meets siding.
Different building materials meet.
Additions connect to the original house.
Steps meet the building.
Porches attach.
Utility lines enter.
Foundation repairs have been made.
Small construction gaps can disappear visually because they’re in shadows or tucked beneath siding.
Use a flashlight even during the day if necessary.
Cracks Aren’t All Equal
A hairline crack in concrete isn’t automatically a mouse doorway.
Remember what you’re looking for:
An opening that actually leads somewhere.
If the crack widens near a pipe or structural transition, investigate more carefully.
If you see mouse droppings or gnawing nearby, that’s even more interesting.
The goal isn’t to panic over every imperfection in your foundation.
It’s to identify openings large enough and deep enough to provide access.
6. Crawl-Space Openings Need a Close Look
If your house has a crawl space, inspect:
- Crawl-space doors
- Vents
- Screens
- Foundation penetrations
- Access panels
- Damaged covers
- Utility openings
CDC specifically includes crawl-space vents and crawl spaces among the areas homeowners should inspect for rodent entry.
A mouse that gets into a crawl space isn’t necessarily in your kitchen yet.
But now it’s beneath the house with access to plumbing, wiring, insulation, wall cavities, and other pathways.
That’s not where I want it.
Don’t Forget the Crawl-Space Door
Access doors sometimes get treated like an afterthought.
Maybe it’s a piece of plywood.
Maybe the latch doesn’t pull it tight.
Maybe one corner has rotted.
Maybe the frame has shifted.
Inspect the entire perimeter.
If the opening is accessible to mice, repair it with materials appropriate for exterior rodent exclusion rather than simply stuffing something soft into the gap.
7. Basement Windows and Vents Can Let Mice In
Basements give mice another collection of possible entry points.
Look around:
Windows.
Window wells.
Vents.
Utility lines.
Floor-to-wall joints.
Doors.
Foundation penetrations.
If an old basement window doesn’t close tightly, a surprisingly small corner gap may be enough.
Screens also need to be intact and appropriately fitted.
Remember, we’re looking for mouse-sized imperfections, not broken windows.
8. Dryer Vents Need Attention, but Don’t Block Airflow
Dryer vents are worth inspecting because they create an intentional opening through the exterior wall.
Check around the perimeter where the vent assembly meets the house.
Make sure the exterior vent is functioning correctly and isn’t damaged.
But be smart here.
Don’t improvise a mouse repair that restricts dryer airflow or creates a lint buildup and fire hazard.
If the vent itself is damaged or inappropriate, use a properly designed replacement rather than covering it with something that interferes with operation.
The hole around the vent and the actual vent opening are two different issues.
Seal the structural penetration correctly while keeping the dryer exhaust working as designed.
9. Look Around Other Vents
Homes need ventilation, which means openings.
Inspect:
Attic vents.
Crawl-space vents.
Foundation vents.
Other exterior ventilation openings.
You’re looking for missing or damaged screening, loose edges, and gaps around the vent frame.
A vent doesn’t need to be eliminated.
It needs to perform its job without doubling as a mouse entrance.
Use an appropriate rodent-resistant repair that doesn’t interfere with the vent’s required airflow.
10. Yes, Mice Can Get in Higher Up
One of the biggest mistakes is assuming mice only enter at ground level.
House mice are excellent climbers.
MU Extension notes that they can run up rough vertical surfaces, travel along wire cables and ropes, and jump about 12 inches from the floor onto a flat surface.
UC IPM similarly notes that vegetation growing against buildings can help mice because they’re capable climbers.
So look up.
Especially if you’re finding mouse evidence in an attic.
Inspect the Eaves and Soffits
CDC recommends checking:
Rafters.
Gables.
Eaves.
Soffits.
These upper structural areas can develop openings from damage, aging, construction gaps, or missing material.
A mouse doesn’t have to walk straight through the foundation and climb inside your walls.
It can climb outside and enter higher.
If your attic is where most of the activity is happening, this part of the inspection becomes much more important.
Look Where Rooflines Meet
Complex roofs create lots of transitions.
Additions.
Dormers.
Porches.
Attached garages.
Different roof elevations.
Every transition creates another place where building materials have to meet correctly.
You don’t need to climb onto a dangerous roof to perform an inspection.
Use binoculars from the ground where practical or hire someone qualified to inspect inaccessible roof areas.
Finding a mouse isn’t worth falling off a ladder.
11. Siding Can Hide Openings
The visible face of your siding may look perfect.
That doesn’t mean every edge is sealed.
Inspect:
Bottom edges.
Corners.
Trim.
Utility penetrations.
Areas around exterior fixtures.
Places where siding meets masonry or foundation.
Damaged sections.
You’re not trying to caulk every ventilation path in a siding system. Some building assemblies are intentionally designed to drain or ventilate.
You’re looking for actual structural openings that provide rodents access behind the exterior envelope.
If you’re unsure whether an opening is intentional, don’t blindly fill it.
12. Check Around Air-Conditioning Lines
Central air-conditioning systems commonly have refrigerant and electrical lines passing through an exterior wall.
Look closely around that penetration.
Is there a gap around the line set?
Has old sealant pulled away?
Is insulation damaged?
Can you see into the wall?
It’s exactly the kind of location that’s easy to overlook because everyone is looking at the air conditioner rather than the hole behind it.
13. An Attached Porch or Deck Can Hide the Problem
Anything built against the house can make inspection harder.
Decks.
Porches.
Steps.
Patios.
Additions.
You may not have a clear view of the foundation behind them.
If mouse activity is concentrated near one of these areas, investigate as much of the hidden junction as you safely can.

Our broader guide to finding where an animal is getting into your house explains how I use the location of indoor evidence to narrow down a mystery entry route.
With mice, we’re applying the same strategy at a much smaller scale.
14. Mice Can Enter Through an Open Door Too
Not every mouse entrance is a construction defect.
Sometimes a mouse runs through an open garage or exterior door.
This is especially possible when a door stays open for long periods.
A mouse entering once doesn’t necessarily mean your house has a permanent 1/4-inch structural hole.
But if mice keep appearing, I wouldn’t blame the occasional open door until I’ve completed a real inspection.
Repeated mouse problems usually deserve a search for a repeatable access route.
Why Do Mice Suddenly Come Inside?
Sometimes mouse activity seems to appear out of nowhere.
Outdoor conditions change.
Food availability changes.
Weather changes.
And cooler weather can drive more mouse activity around structures.
UC IPM notes that where outdoor house-mouse populations exist, they frequently enter homes in autumn as nighttime temperatures become colder.
That doesn’t mean mice only enter in fall.
They can become indoor pests any time the opportunity is there.
But seasonal changes can make an existing weakness in your house suddenly much more noticeable.
Rural Houses Can Be Especially Challenging
If you live around fields, barns, livestock, gardens, grain, chicken feed, or wooded areas, mice outside aren’t exactly unusual.
Trying to eliminate every mouse from the surrounding property isn’t realistic.
The house is where you draw the line.
That makes structural exclusion even more important.
The mice can exist outside.
What I don’t want is an easy path from the field to the garage to the pantry.
Can Mice Climb Into a House?
Absolutely.
This is why I don’t want you doing only a foundation inspection.
House mice can climb rough vertical surfaces and move along wires and similar pathways.
Vegetation touching the building can also provide cover and climbing opportunities.
Trim back vegetation that creates heavy cover directly against the structure.
And if you’ve checked everything at ground level without finding the entrance, start looking higher.
Can Mice Come Through the Roof?
They can enter through openings around the roofline and attic.
The important distinction is that they aren’t somehow chewing straight through an intact roof for fun.
Look for existing vulnerabilities:
Damaged soffits.
Gaps around eaves.
Vent problems.
Construction openings.
Roofline transitions.
If you’re hearing activity mainly above the ceiling, an attic inspection can help determine whether the mice are entering high or simply traveling upward from somewhere else.
Can Mice Come Through Air Vents?
They can exploit openings around vents and improperly protected ventilation openings.
But don’t start sealing functional ventilation systems shut.
That’s not mouse-proofing.
That’s creating another house problem.
Inspect the edges, screening, covers, and construction around the vent.
If the vent requires airflow, repair it in a way that maintains its intended function.
Can Mice Come Through Plumbing?
They commonly exploit gaps around plumbing.
That’s different from saying every mouse is swimming through your water pipes.
If mice appear beneath your sink, look at the holes where pipes enter the wall or floor before inventing a complicated plumbing explanation.
Those construction gaps are much more straightforward.
Can Mice Get Through a Closed Door?
If there’s enough space beneath or around it, yes.
“Closed” and “sealed” aren’t the same thing.
Look at the gap under the door.
Inspect both corners.
Check the sweep.
Check weather stripping.
If you can slide something pencil-width through a gap, don’t assume a mouse sees the door as closed.
Can Mice Get Through Expanding Foam?
I wouldn’t rely on ordinary expanding foam alone as my permanent mouse barrier.
Mice gnaw.
UC IPM specifically warns that gnawable materials, including insulating foam, aren’t suitable by themselves for plugging established mouse openings.
Foam can still be useful as part of certain building repairs.
But where mice are actively using an opening, incorporate an appropriate durable, gnaw-resistant material.
What Should I Use to Seal Mouse Holes?
The repair depends on the hole.
For small openings, CDC recommends steel wool secured in place with caulk or spray foam.
For larger openings, CDC suggests durable materials such as:
- Hardware cloth
- Metal sheeting
- Lath screen
- Cement
- Other appropriate metal materials
MU Extension similarly recommends metal or concrete for cracks and openings around foundations, pipes, vents, and utilities.
I wouldn’t buy one giant tube of something and assume it is the correct solution for every opening on the house.
Match the repair to the structure.
Steel Wool Is Useful, but Understand What It’s Doing
Steel wool can work well for small gaps, particularly as part of a sealed repair.
CDC recommends putting caulk around it to hold it in place.
UC IPM describes steel wool as useful for temporary plugging but notes that it can rust over time.
So I wouldn’t stuff a wad loosely into an exterior hole and declare victory for the next 20 years.
Use it thoughtfully.
For a permanent exterior repair, durability matters.
Hardware Cloth Is Better for Some Larger Openings
When you need to cover a larger opening while maintaining ventilation, appropriately sized metal hardware cloth may be useful.
The installation matters as much as the material.
A mouse doesn’t care that you bought good hardware cloth if there’s a half-inch gap around the edge.
Fasten repairs securely.
Make sure the surrounding material is sound.
And don’t block airflow where ventilation is required.
Don’t Seal One Hole and Assume You’re Finished
This is another common mistake.
You find a beautiful mouse-sized hole beside a pipe.
Aha!
You seal it.
Then you catch another mouse.
That doesn’t necessarily mean your repair failed.
There may be another opening.
I approach mouse exclusion as a whole-house inspection.
Finding one entrance is great.
Finding every practical entrance is the goal.
Look for Evidence Around Suspected Entry Points
An opening becomes much more interesting when there’s evidence nearby.
Look for:
- Droppings
- Gnawing
- Nesting material
- Tracks in dusty areas
- Repeated sightings nearby
Sometimes you’ll find several possible openings but only one area with concentrated mouse activity.
That can help prioritize repairs.
Trap While You’re Working on Exclusion
If you already have mice inside, don’t assume sealing the house makes them disappear.
They are still inside.
Continue trapping in active areas while repairing entry points.
CDC recommends trapping rodents already inside while sealing openings to prevent additional rodents from entering.
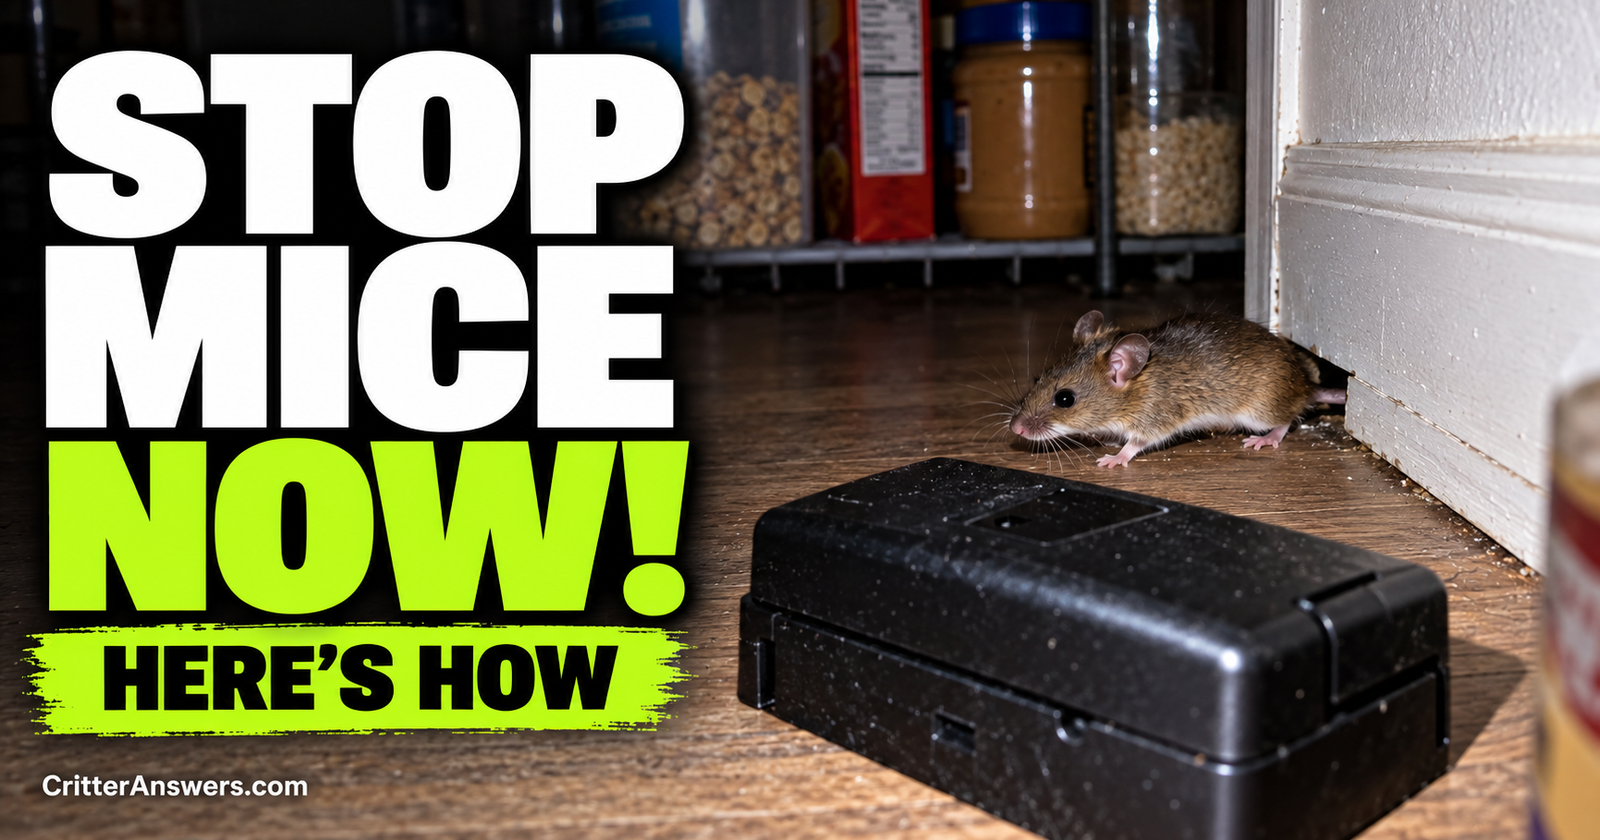
Our complete guide to getting rid of mice in your house for good walks through the trapping, sanitation, cleanup, and exclusion process together.
That’s important because mouse-proofing and mouse removal solve different halves of the same problem.
Use Enough Traps While You Seal the House
If mouse activity is spread through several areas, I don’t want one trap trying to cover the entire building.
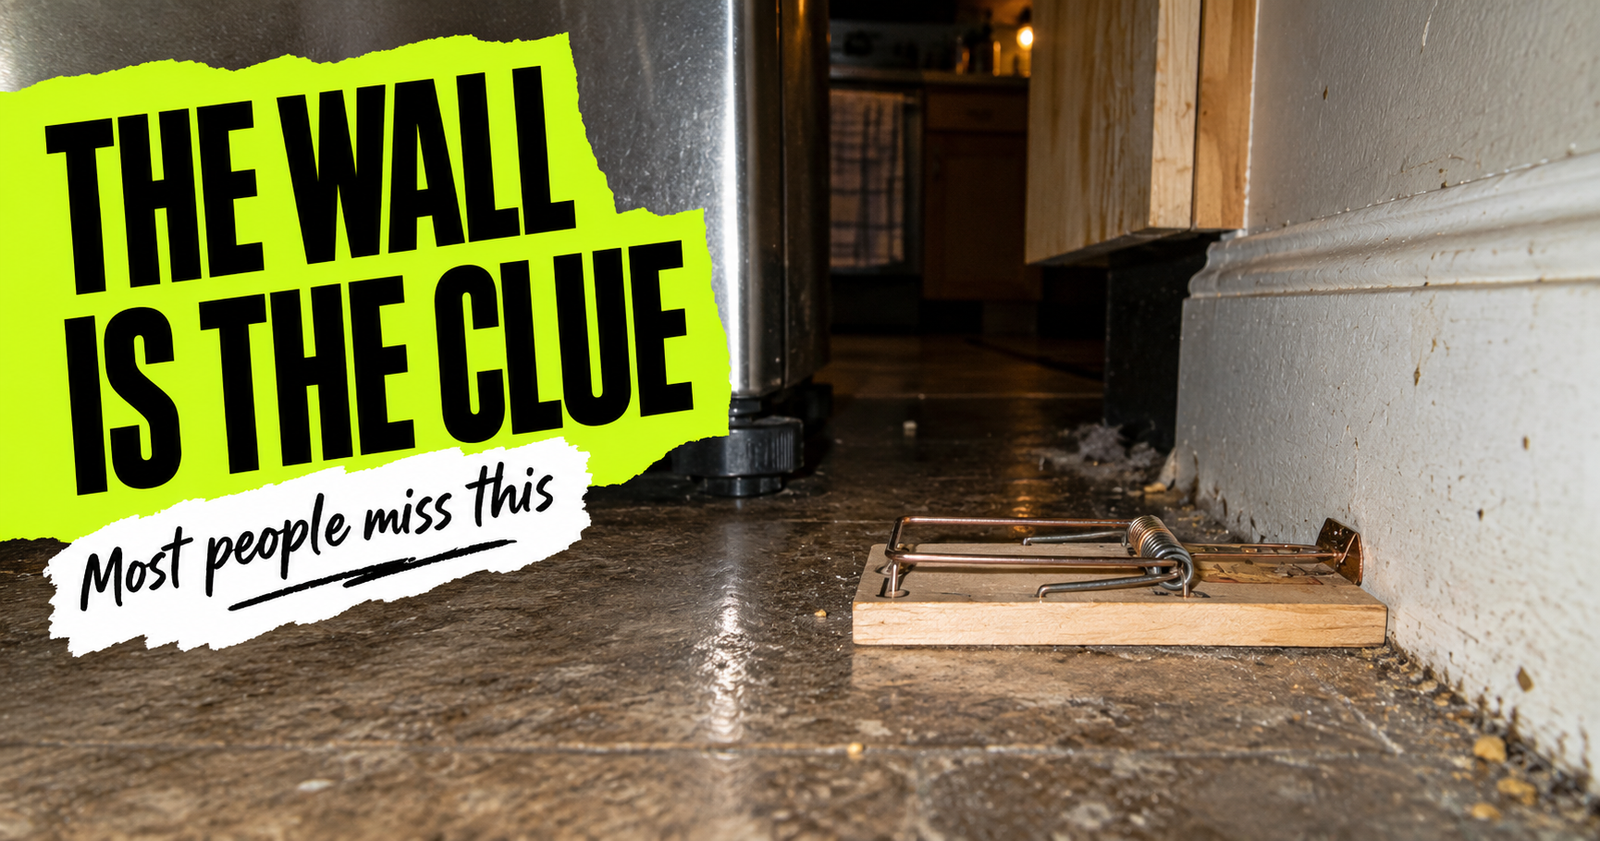
Traditional snap traps are useful here because you can put multiple traps along active routes without spending a fortune.
The Victor Metal Pedal Mouse Traps 12-Pack is a practical option when you need enough traps to cover several known activity areas while you’re closing exterior entry points.

Check the Victor Metal Pedal Mouse Traps 12-Pack on Amazon
Put traps where the evidence actually is — along walls, behind appliances, and near areas with droppings or gnawing — rather than scattering them randomly.
And always keep traps inaccessible to children and pets.
What If You Prefer an Enclosed Trap?
If you don’t like exposed traditional snap traps, the OWLTRA OW-2 Indoor Electric Mouse Trap gives you another option.
It’s an enclosed electronic trap intended for indoor mouse control, and the two-pack lets you target more than one active location.

Check the OWLTRA OW-2 Indoor Electric Mouse Trap 2-Pack on Amazon
I wouldn’t buy both products just because they’re mentioned here.
Choose the trapping style that makes sense for your household and use enough traps for the amount of activity you’re seeing.
The entry-point work remains the same either way.
Don’t Forget Food While You’re Mouse-Proofing
You can make exclusion harder on yourself if mice have an endless food supply inside.
While you’re sealing openings:
Store pet food securely.
Protect bird seed.
Clean spilled grain.
Seal pantry foods.
Secure garbage.
Clean behind appliances.
Remove unnecessary clutter.
UC IPM points out that sanitation by itself usually won’t eliminate a mouse infestation, but reducing food and shelter makes the environment less supportive of mice.
Think of it as making the house harder to enter and less rewarding once inside.
How Do I Know If I’ve Found the Real Mouse Entrance?
Sometimes you won’t know with absolute certainty.
That’s okay.
If you’ve found an opening large enough for mice that serves no legitimate purpose, repair it.
Then monitor.
Safely clean existing droppings.
Continue trapping.
Watch for new evidence.
If mouse activity stops, great.
If it continues, keep inspecting.
You may have missed another entrance.
What If I Can’t Find Any Mouse Holes?
This happens.
Start over, but change your approach.
Instead of inspecting the house randomly, work backward from the evidence.
Where are the newest droppings?
Where are mice being caught?
Where do you hear activity?
Which wall is involved?
What utilities pass through that wall?
What’s on the exterior side?
Is there an attached garage?
What’s directly above or below the area?
This turns a giant house into a smaller investigation.
Sometimes the Entry Point Is Hidden
A porch may block your view.
A deck may cover part of the foundation.
Siding may hide a construction gap.
An appliance may hide an interior opening.
An attic entry may be difficult to see from the ground.
That’s where our general animal entry-point inspection guide becomes useful.
You don’t necessarily need to see the mouse physically squeeze through the hole.
You need to find and eliminate plausible structural access.
Should I Seal Mouse Holes If Mice Are Still Inside?
Yes, exterior exclusion and indoor trapping should generally work together when you’re dealing with house mice.
You’re trying to stop new mice while removing the mice already indoors.
That’s different from blindly sealing a large wild animal inside a structure.
With mice, effective management generally combines exclusion with population reduction and sanitation. MU Extension describes those as the three major components of house-mouse control.
Keep traps operating indoors while you close exterior access.
Then monitor carefully.
How Long Should I Watch After Sealing the Holes?
Don’t put the tools away the afternoon you finish sealing.
Continue checking:
Traps.
Droppings.
Food packages.
Previously active areas.
Nighttime sounds.
CDC says that when a week passes without a capture and there are no new rodent signs, the infestation has likely been eliminated.
I’d still keep an eye on the old problem areas afterward.
A house changes.
Sealants age.
Doors shift.
Repairs fail.
New utility work happens.
Mouse-proofing isn’t something you inspect once in your lifetime.
My Whole-House Mouse Entry Checklist
If I couldn’t figure out how mice were getting into my house, this is the route I’d take:
Inside first
Check beneath sinks, behind appliances, around plumbing, utility lines, cabinets, basement walls, crawl-space access, and attic areas.
Foundation
Walk the entire perimeter and inspect every material transition and penetration.
Doors
Check thresholds, sweeps, weather stripping, frames, and bottom corners.
Garage
Inspect the overhead door, side doors, shared wall, and utilities.
Utilities
Check plumbing, electrical, cable, gas, HVAC, and other penetrations.
Vents
Inspect frames, screens, and surrounding gaps without blocking required airflow.
Crawl space and basement
Check access doors, vents, windows, and foundation penetrations.
Roofline
Look at eaves, soffits, gables, attic vents, and construction transitions.
Exterior surroundings
Look for vegetation, clutter, feed, woodpiles, and other conditions encouraging mice to remain immediately beside the house.
And remember:
You’re looking for openings around 1/4 inch and larger.
Not giant holes.
The Hole May Be Smaller Than You Think
That’s really the answer to why finding a mouse entrance can be so frustrating.
You’re standing outside looking for obvious damage.
The mouse only needs something about pencil-width.
So slow the inspection down.
Look under the sink.
Look behind the stove.
Check the garage-door corners.
Follow every utility line.
Look around the foundation.
Then look up at the soffits and roofline.
Once you find the openings, repair them with materials mice can’t easily defeat and continue trapping whatever is already indoors.
Don’t settle for catching the mouse you saw.
Make it difficult for the next one to get inside.
About the author: Caleb Rourke researches how mice and other rodents get into homes, where they hide, and the practical steps homeowners can use to identify and prevent them. He writes straightforward rodent-control guides for Critter Answers.